There I was, whipping around the dance floor doing a fast waltz which involves some crossing of the feet for tight and quick turning. Suddenly another dance couple veered into our path and I had to abort my execution of a step. While we were able to avoid a collision, I scraped my left heel into by right toe...did I mention I wear only "Latin' dance shoes which are open toe?) The heels of my dance shoes are sharp because they don't get worn down...you are mainly on the balls of your feet whilst dancing
.
We continued dancing of course until the waltz ended. I felt something funny and looked down to see blood running out of my shoe and on to the dance floor. Not good, I thought. I tried to stem the tide with the one bandage I had in our dance shoe bag but we had to go home as it was obvious I had really gouged the crap out of my toe and one bandage wasn't gonna do it. Luckily it finally quit bleeding and today it's just a bit sore. I have found over my 12 years of ballroom dancing that the worst injuries I've suffered on the dance floor have always been self-inflicted!
 Got potatoes? I do! Direct from Ronniger's Potato Farm in Austin, Colorado via UPS. 4+ pounds of seed potatoes for fun in the garden this spring. I may have been a bit too enthusiastic, ordering them a bit too early judging from the cold weather we're having but they will store until it's nice enough for this gardener to go outside and plant 'em...probably April
!
 As you all probably know, you can't use supermarket potatoes if you want a good crop...they are treated with an inhibitor so they won't sprout well. Seed potatoes are grown especially for gardeners. Ronniger's has probably over 150 varieties to choose from...making it a challenge. I try to pick an early red skinned one (robbing some for new potatoes & peas in June), a late, big butterball type that I harvest in November, Yukon Gold for our main potato and some fingerlings for potato dishes and roasting. I usually use the method called"greening" or pre-sprouting to get them going in a warm, well lit space before planting. This will make a better and quicker maturing crop. There is nothing so good as a fresh potato...they have a wonderful nutty taste...no comparison to the duds from the supermarket!
We knew her...a nice Irish lass....To celebrate the upcoming "green holiday" I found a large basket at Freddies, the perfect size for a mini herb garden. Now days you can easily plant a basket by using a "grow bag" or "smart pot," a very heavy fabric sewn into a square or round shape. It keeps the potting soil in place. Do use potting soil...worth the expense because it isn't as heavy as garden dirt.  I used small plants: parsley, chives, oregano, rosemary, dill, thyme (both English & Lemon) and some lettuce for fun. Later I'll add in some basil and repot the herbs that grow too big for the basket.
  Here you can see the grow bag liner which I folded over to just above the basket height to keep the soil & water from overflowing into the basket. This basket is about 16" square and needs the cookie sheet for support until I place it out in the garden on something...yet to be determined. Meanwhile I can snip bits of herb with my scissors and it's happy in the greenhouse, out of the cold spring weather. .
The greenhouse kit from Gardener's Supply arrived via FedEx in 5 boxes weighing a total of 43 pounds. Since it was only 4' x 6' x 88" tall, we figured it would take us about a day to prepare the site and erect the little wonder.  .The recommended base of cedar 4x4's was easy to level and secure to the ground using rebar pounded through holes we drilled in the wood. So far so good...
 Then we constructed the frame made from extruded aluminum pieces. The directions (7 pages) were pitiful considering they were written in the USA by the folks in Burlington, Vermont. Many holes were not pre-drilled properly and the undergardener had to re-engineer some of the frame. Once the frame was ready we moved it on to the cedar base and began to put in the UV treated, double-wall plastic panels (made in Connecticut.) The panels had very ragged edges and were difficult to fit in the frame channels. We used some silicone spray on the channels and trimmed the edges of the plastic. Even with all the panels in, the building was floppy. Day One was over and we were exhausted! On Day Two, once again Jack added some reinforcing. He had to re-bend several pieces to fit. Then the roof had to be put together and set up on the walls. That was fun! Good thing Jack has long arms! "Fine tuning" was done with a length of 2x4, pounding on the roof top ridge to get it to fit the walls. Then, even though we were tired, we installed the shelving kit. We had to add 1/4" aluminum shims to make it fit across the sides to the frame pieces. Nothing new, as we were used to doing that by now...but it sure stiffened up the whole building!
  The fun for me came the next day when we got to arrange the inside. We added 2"x12" cedar shelves to the bottom, resting on the base. I put in all the stuff I've had in boxes stashed all over the yard because I didn't have any place to store them...pots, tools, fertilizer, baskets, saucers...
  Jack made lots of hooks from his special heavy-duty wire so I could hang up tools & supplies. We added a very safe, electric heater to keep the plants happy when it was cold outside this spring.It also keeps the gardener happy while she sits in there (dreaming of garden stuff) and it's 35 degrees outside!OUR ADVICE? UNLESS YOU ENJOY THE CHALLENGE AND HAVE A MACHINE SHOP, BUY A GREENHOUSE THAT IS ALREADY PUT TOGETHER! MY ADVICE: DON'T WAIT 40 YEARS TO GET A GREENHOUSE!DID I MENTION THAT DESPITE THE HASSLE, I DO LOVE MY LITTLE "CASTLE" AS JACK CALLS IT.
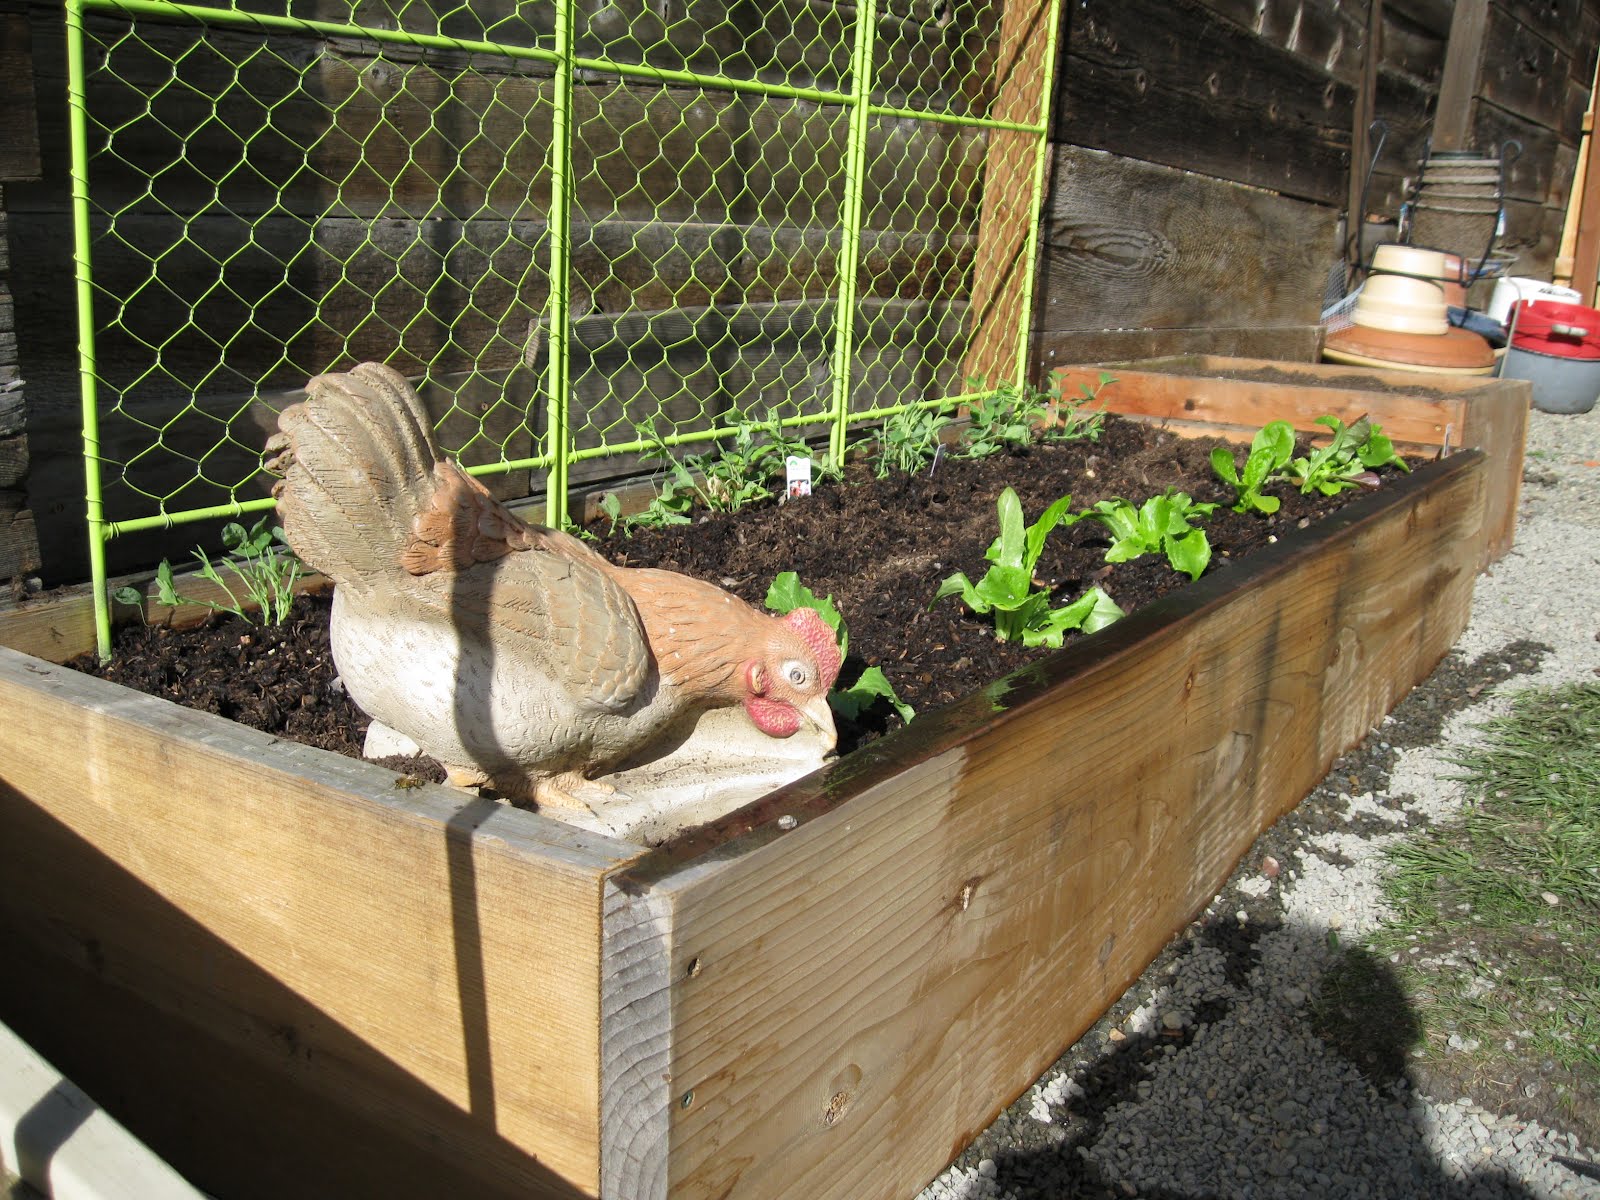
I suffer from chicken withdrawal but my under gardener has decreed, "No chickens, please!" What's a girl to do? So at least with these trellises made from chicken wire and my concrete chicken I can pretend! I'm sure these lovely but light duty, hecho in Chine trellises will hold up the sweet peas I have planted along the bottom. The trellises arrived slightly rusted, (on sale from Gardener's Supply in Burlington, VT) so my under gardener thought a fine coating of hammered silver was just the thing!
 Oye!
 I couldn't live with silver so I found some "spring green," a lovely and garish yellowish green Rustoleum shade at the hardware store. But the under gardener did get points for his ingenious method of securing them to the cedar bed and keeping them spaced away from the World's ugliest fence! I added some lettuces for now, but plan to put my pimento peppers there in late May after we've harvested and enjoyed the lettuce.
Chris & Susan gave Chase a sheep for Christmas. It looked tough enough to withstand a terror terrier's incisors....but, not so much! Chase immediately chewed off the face on Christmas Day! After 2 months, poor old "Sheepy Sheep" had lost his head, tail and one leg. So it was clearly confiscation time. But it was Chase's go-to toy. If you told him to "go get a toy," it was "Sheepy Sheep" that he brought to you.Luckily, the Grange Coop here in Medford has the same line of vinyl toys, so for $3.99 we adopted another sheep. Of course it didn't have the same...ah....patina & "eau du dog" of Sheepy Sheep's 2 months of dog slime buildup but Chase is working on that!